
Checkup 1.0.7 · User guide
Add device pictures
Reviewed
Attach pictures to a device test from the processing computer or a phone.
Open the correct test
In an initialized station, select the device’s card and open DEVICE PICTURES. Check the device name and Test ID before uploading. Pictures are attached to that test.
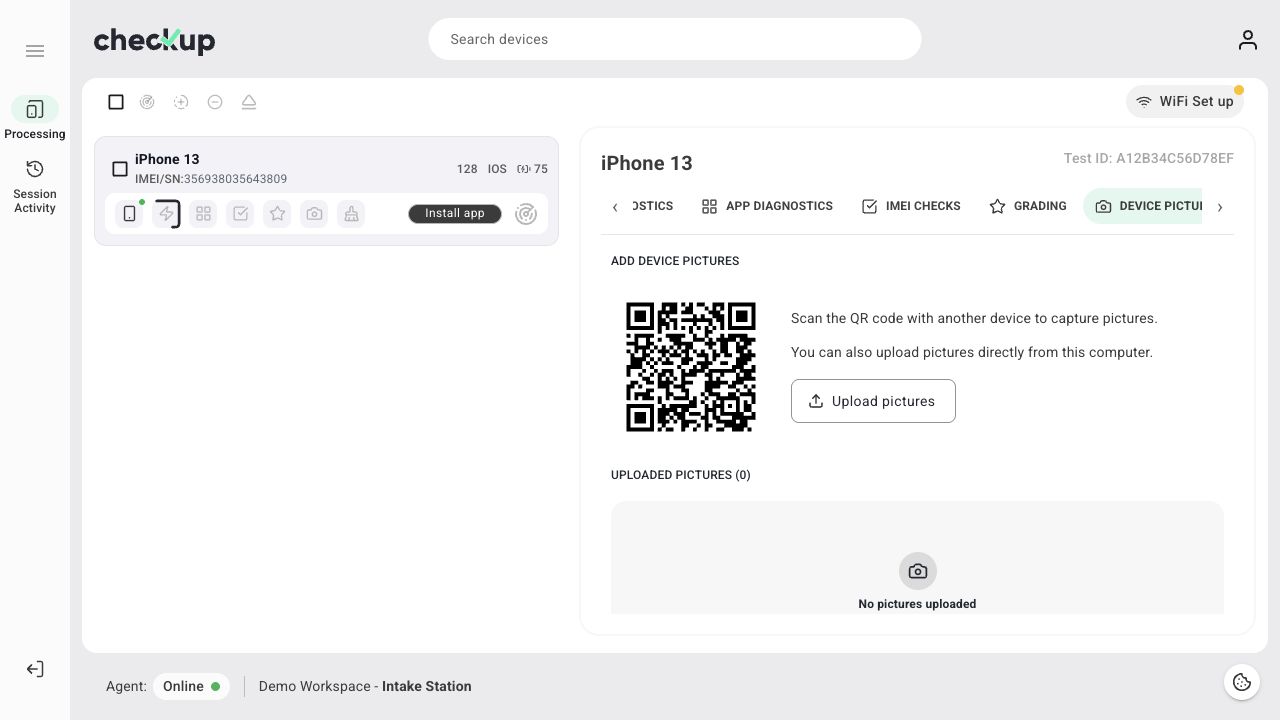
Upload from the computer
- Choose Upload pictures.
- Select a supported image file from the computer.
- Wait for the upload to finish.
- Confirm that the image appears under UPLOADED PICTURES and that the count increases.
- Repeat for the other views you need, up to four pictures for the test.
A selected file or an upload in progress is not the same as a saved picture. If an error appears, retry and check the gallery before leaving the test.
Upload from a phone
- Scan the QR code in the device’s DEVICE PICTURES panel with the phone you will use to take pictures.
- Open the linked upload page. A separate Checkup dashboard sign-in is not required for this page.
- Confirm the Test ID, workspace, and station shown at the bottom.
- Select a picture slot and use the phone’s available camera or photo-library option.
- Add the views you need, then choose Upload.
- Wait for the page’s completion state and check the desktop gallery.
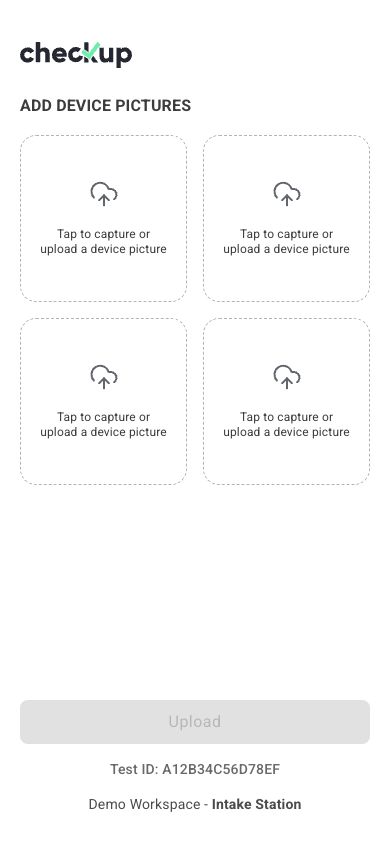
The phone’s camera and file-picker options depend on its browser and operating system. The QR code in this example belongs to a sample session; use the code displayed in your own test.
Supported pictures
- Formats: JPEG, PNG, or WebP.
- Maximum size: 10 MiB per picture.
- Maximum count: four pictures per test.
HEIC files are not supported by this upload flow. Export or convert an HEIC photo to a supported format before selecting it.
Review the pictures
Open a thumbnail to inspect the expanded picture. Use the original-size preview to check details. If a picture is wrong and removal is available, remove it from the test and upload the correct image.
If the workflow sets a minimum picture count, check that your team’s target is met before completing the device. In 1.0.7 the minimum is a progress target; it should not be treated as a guaranteed block against ending a test early.
Find pictures later
Open History or Session Activity, select the Test ID, and open DEVICE PICTURES for a test with saved pictures. This keeps the evidence with the specific test rather than relying on a separate shared folder.
Troubleshooting
- Expired or unavailable phone link: return to the active desktop test and use its current upload link.
- Upload failed: check format, size, connection, and remaining picture slots; retry and verify the gallery.
- Wrong test details: close the upload page and scan the code from the correct device.
- Picture missing from the expected record: compare the Test ID on the phone and desktop before uploading again.
Screens show the Checkup interface with sample data. Names and results in your workspace will differ.