
Checkup 1.0.7 · User guide
Data hosting and regional servers
Reviewed
Review the region selected for your account and first workspace during signup.
Check your region before creating your account
During signup, Checkup displays the region selected for your account and first workspace. The available regional choices are the United States, European Union, and United Kingdom.
Check the displayed choice before finishing signup, particularly if your organization requires a specific workspace region.
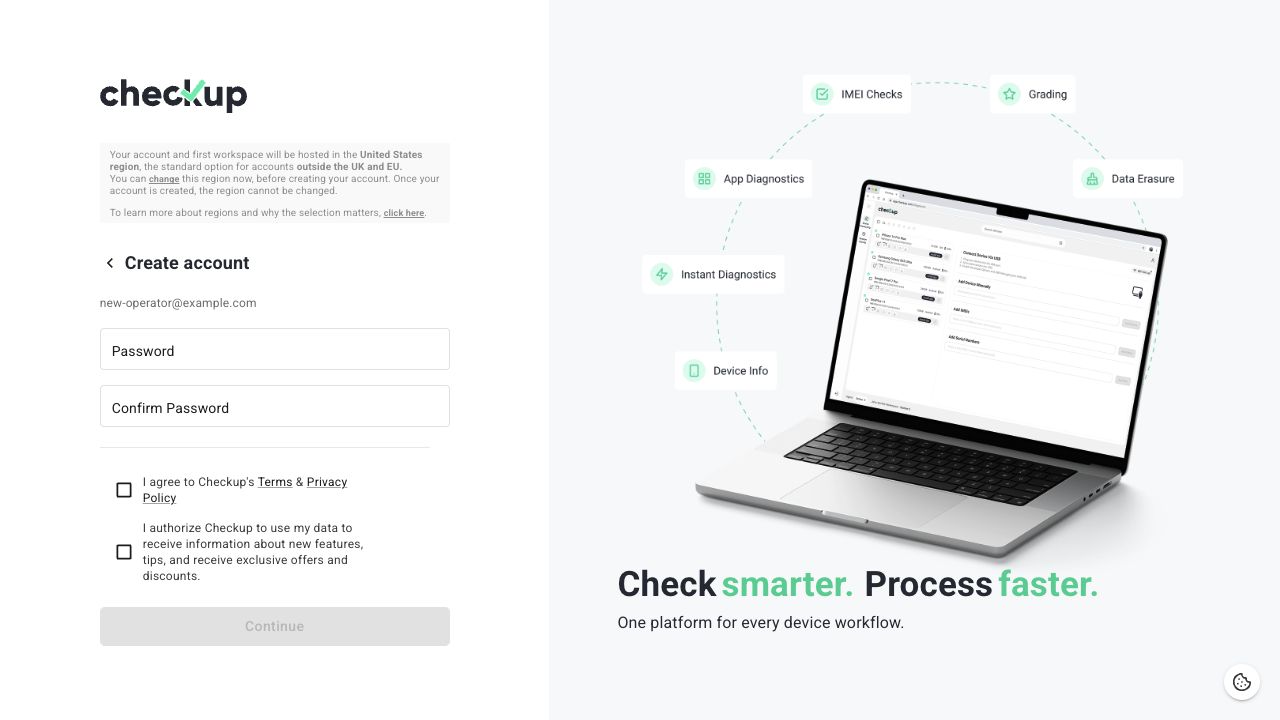
Change the selection during signup
- Enter your email address and continue to account creation.
- Read the region notice on the signup screen.
- Use the change-region link if the displayed region is not the one you need.
- Review your country and region in the selection dialog.
- Confirm the selection and check the updated notice before completing signup.
After the workspace has been created
Changing your profile language or timezone does not change the workspace’s region. There is no region-migration control on My Profile or My Workspace in this release.
If you already created the workspace in a different region from the one you need, contact Checkup support before creating replacement workspaces or moving your team’s process.
Working with your team
Agree on the intended workspace and region before inviting colleagues or processing devices. When signing in, select the workspace your team uses so its stations and history appear together.
Continue with Set up your workspace and Get started.
Screens show the Checkup interface with sample data. Names and results in your workspace will differ.