
Checkup 1.0.7 · User guide
Process devices and enter information manually
Reviewed
Connect a device by USB or add a manual record, then review and complete its test.
1. Initialize the correct station
Open Processing → Stations. Check that the station is linked to an online Agent, then choose Initialize. Confirm the workspace and station names in the processing screen’s footer.
2. Add a device
Connect by USB
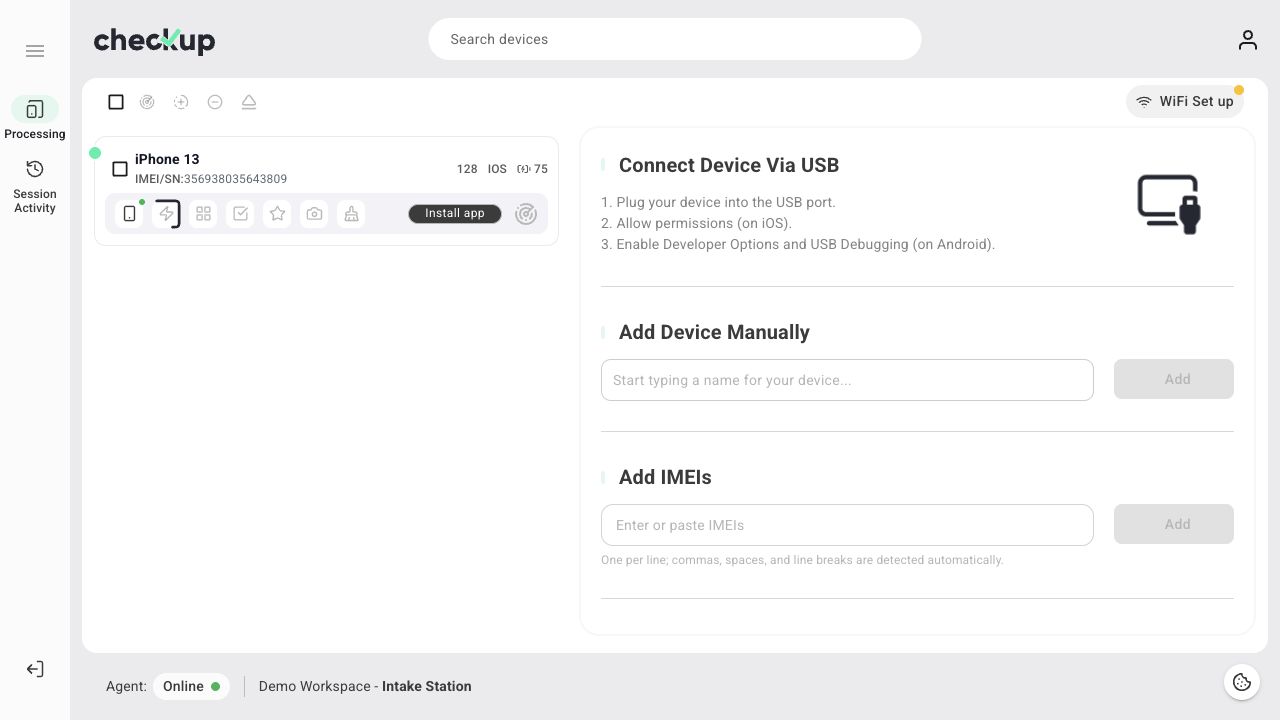
Connect the device to the processing computer. Follow Connect Device Via USB on the screen: allow the requested connection permissions on iOS, or prepare Developer Options and USB debugging on Android. Wait for the device card to appear.
Add by model name
Under Add Device Manually, enter a recognizable device name and choose Add. Use this when you need to record information manually rather than collect it through USB.
Add by IMEI or serial number
Use Add IMEIs or Add SNs, then choose the corresponding Add button. You can paste more than one identifier; commas, spaces, and line breaks are detected as separators. Review the created cards and correct any invalid input reported by the app.
A manual record is not evidence that a connected-device diagnostic test has run.
3. Review the device’s information
Select the device card and check its Test ID. Use DEVICE INFO to inspect General Information, Battery Information, Account Lock Information, and Parts Verification where available.
For manual records, enter the available fields and allow changes to save. Battery Cycle Count and Maximum Capacity are different measurements; put each value in its own field. Leave unknown values empty instead of inventing a zero.
If saving fails, use the retry option and keep the record open until it succeeds. Eject waits for pending manual changes; resolve a save failure before expecting the device to leave the session.
4. Complete the applicable checks
Move through the available tabs: Instant Diagnostics, App Diagnostics, IMEI Checks, Grading, Device Pictures, and Data Erasure. The workflow and device determine what is available. Complete only the actions intended for this device.
- Review device information and instant diagnostics
- Run app diagnostics
- Run IMEI checks
- Add device pictures
- Use Basic Data Erasure
5. Finish the device and review the record
Before choosing Eject, check the results, manual save state, grades, and pictures. Eject finishes/removes the device from active processing; it does not itself erase device data.
Automatic app removal or label printing may run on Eject if the workflow enables them. Keep the required Agent and printer available.
Open Session Activity to review the session’s records. Use the Test ID to distinguish separate processing attempts for the same phone. The record is also available in workspace History.
Finish the session
After completing all devices, choose Exit station. Read the confirmation before proceeding because remaining processing will stop.
Screens show the Checkup interface with sample data. Names and results in your workspace will differ.