
Checkup 1.0.7 · User guide
Configure and download PDF reports
Reviewed
Choose the report language, paper size, and filename, then export a device test.
Set the workspace’s report preferences
- Open Settings.
- Choose Export settings.
- Select the Report language.
- Select the Page size.
- Under Identify exported reports on, choose the filename identifier.
- Wait for the save confirmation after making a change.
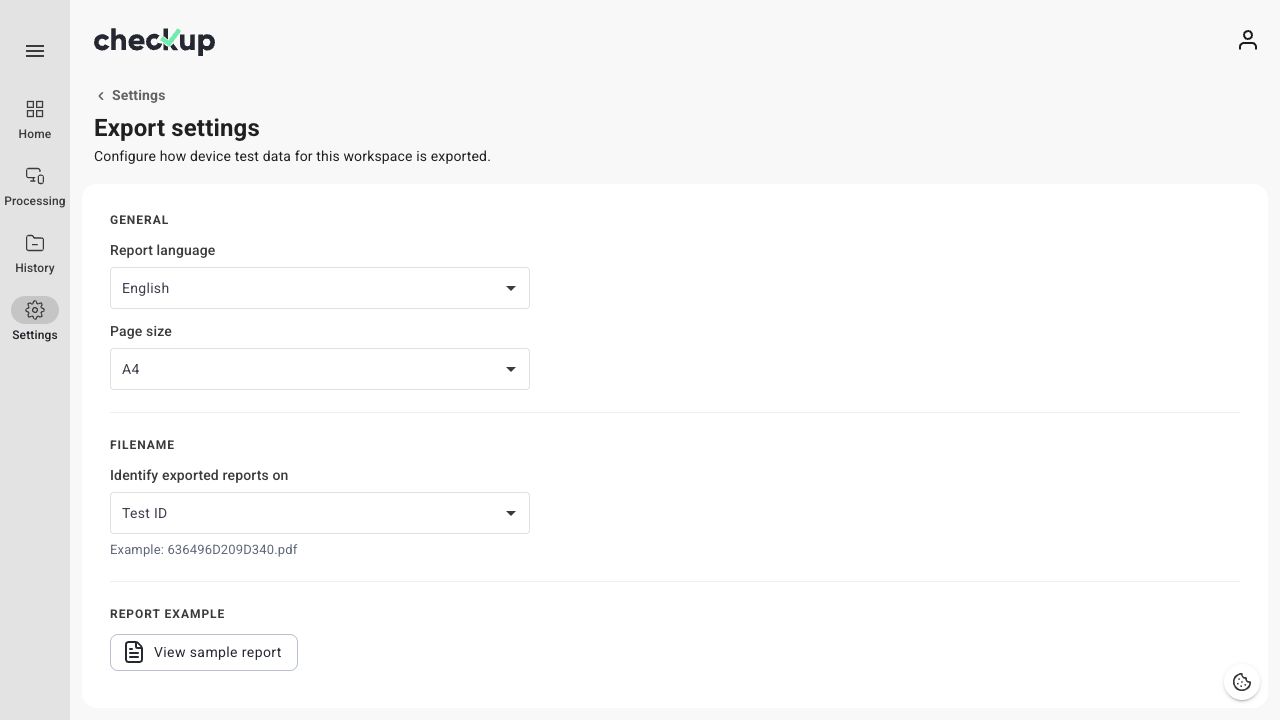
These preferences belong to the workspace. The interface language in My Profile is a separate setting.
Available options
| Setting | Choices |
|---|---|
| Report language | English, Spanish, German, French, Italian, Dutch |
| Page size | A4 or Letter |
| Filename identifier | Test ID, IMEI, Serial Number, or Model + IMEI |
The initial defaults are English, A4, and Test ID. The example filename on the settings page helps you see the selected pattern. If a test lacks the chosen identifier, its report falls back to the Test ID.
Choose View sample report to inspect the report layout. A sample preview illustrates the format; export a real test to review its actual results.
Download a test report
- Open History, or Session Activity in the active station.
- Find the test using its Test ID, device details, and date.
- Open the row’s three-dot menu.
- Choose Download PDF Report.
- Open the downloaded PDF and verify the device, Test ID, and results before sharing it.
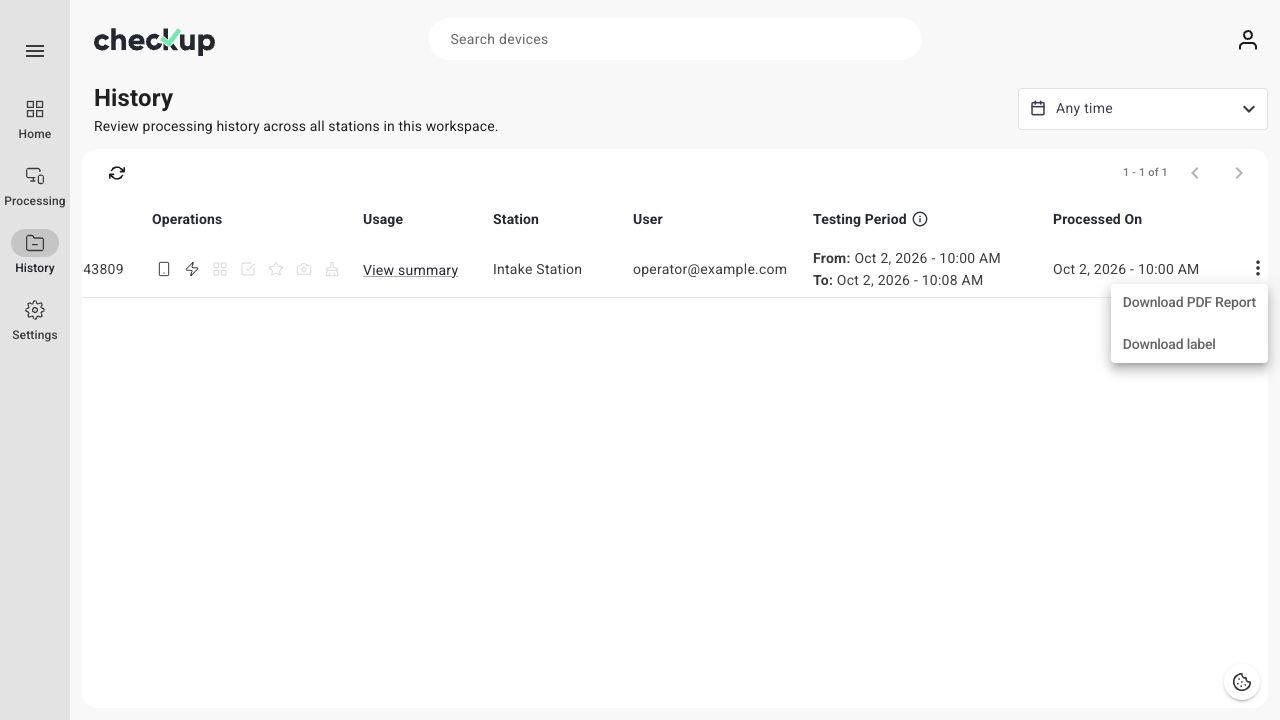
You can also open the Test ID, review the detail view, and use its Download control.
Read the report correctly
Reports include the recorded device information and relevant test results. A field or test marked NOT TESTED was not completed; it does not mean the device passed that check. Missing values should not be read as a measured zero.
The PDF uses selectable text and Checkup branding. In 1.0.7 it is a Device Test report, not a certified erasure certificate, and it does not offer custom workspace branding.
Report versus label
Download PDF Report produces the device test report. Download label produces the device label. Physical label printing is a separate action and requires an online Agent and configured printer; see Review History and print labels.
If a download fails
Check your connection and retry the same test. Confirm that it is the intended Test ID, especially when the same device has been tested more than once. If you changed Export settings, wait for the setting to save before downloading again.
Screens show the Checkup interface with sample data. Names and results in your workspace will differ.