
Checkup 1.0.7 · User guide
Use Basic Data Erasure
Reviewed
Run an OS-level reset for an eligible connected device and review the recorded result.
Before you begin
Basic Data Erasure removes user data and settings. Make sure the correct device is selected and that any required data has been backed up before you begin. Keep the device connected and Agent online while the operation runs.
Basic Data Erasure does not provide an erasure certificate. Certified Data Erasure is shown as unavailable in 1.0.7.
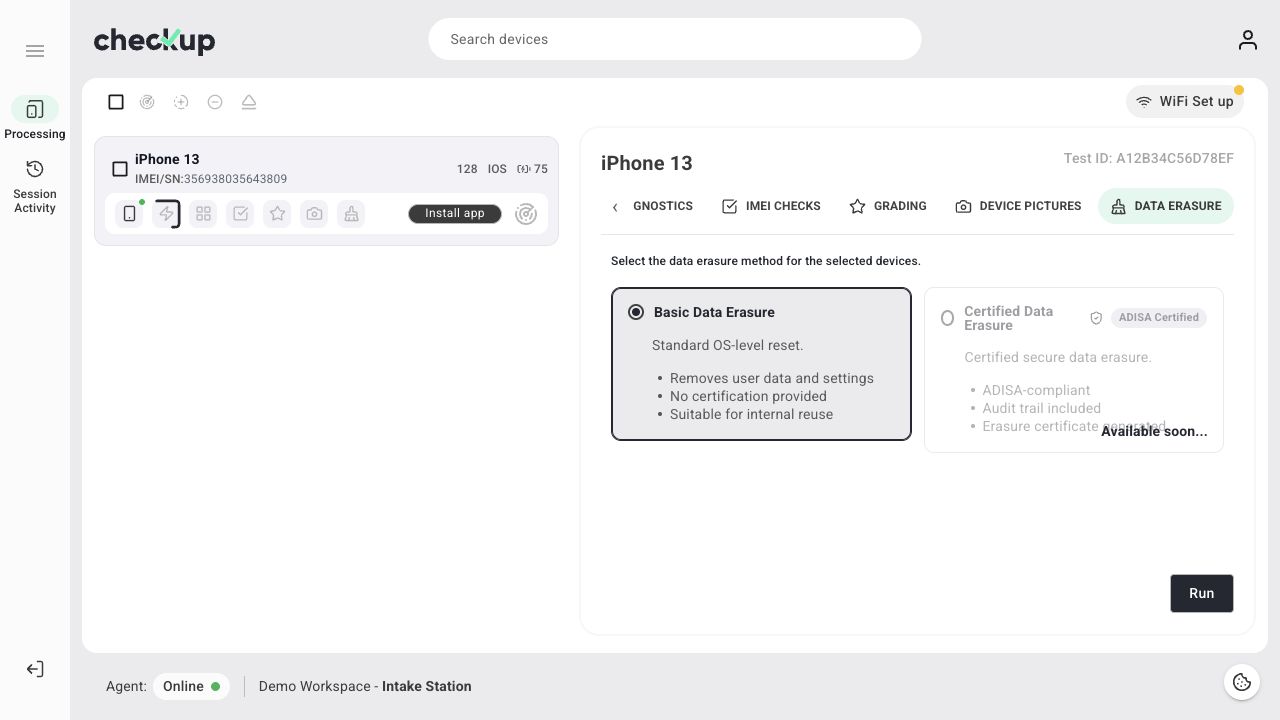
Run erasure manually
- Open the connected device’s card.
- Check the device name and Test ID.
- Open DATA ERASURE.
- Select Basic Data Erasure.
- Choose Run.
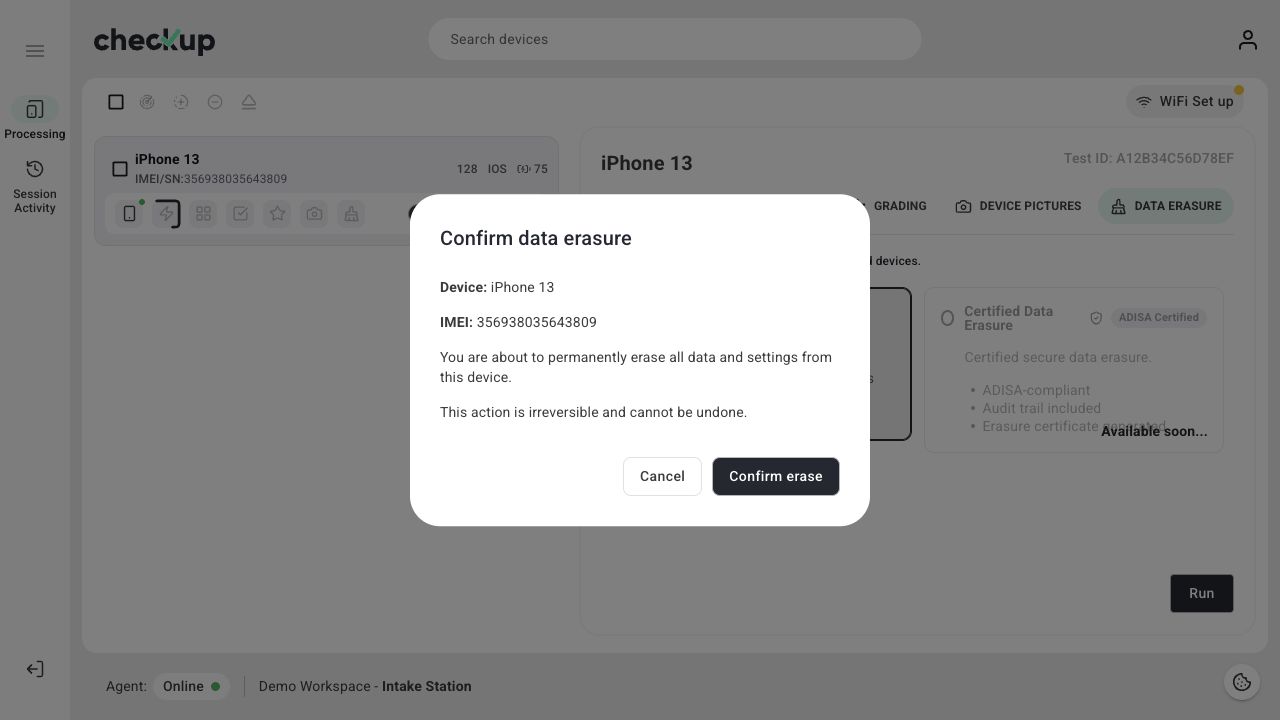
- Read Confirm data erasure and verify the device details.
- Choose Cancel if anything is wrong or you are not ready.
- Choose Confirm erase only when you intend to permanently remove the device’s data and settings.
Wait for a confirmed result
Keep the connection available while Checkup tracks the operation. Review the completion or failure state shown for the test. A request being sent or a device disconnecting is not, by itself, a successful erasure result.
If it fails, read the displayed message, check the device and Agent connection, and resolve the issue before trying again. Review the test record afterward rather than marking the device erased based only on an attempted action.
Enable automatic erasure in a workflow
In Processing → Workflows, enable Data Erasure and select Basic Data Erasure. Read the timing notice, save the workflow, and assign it to the intended station.
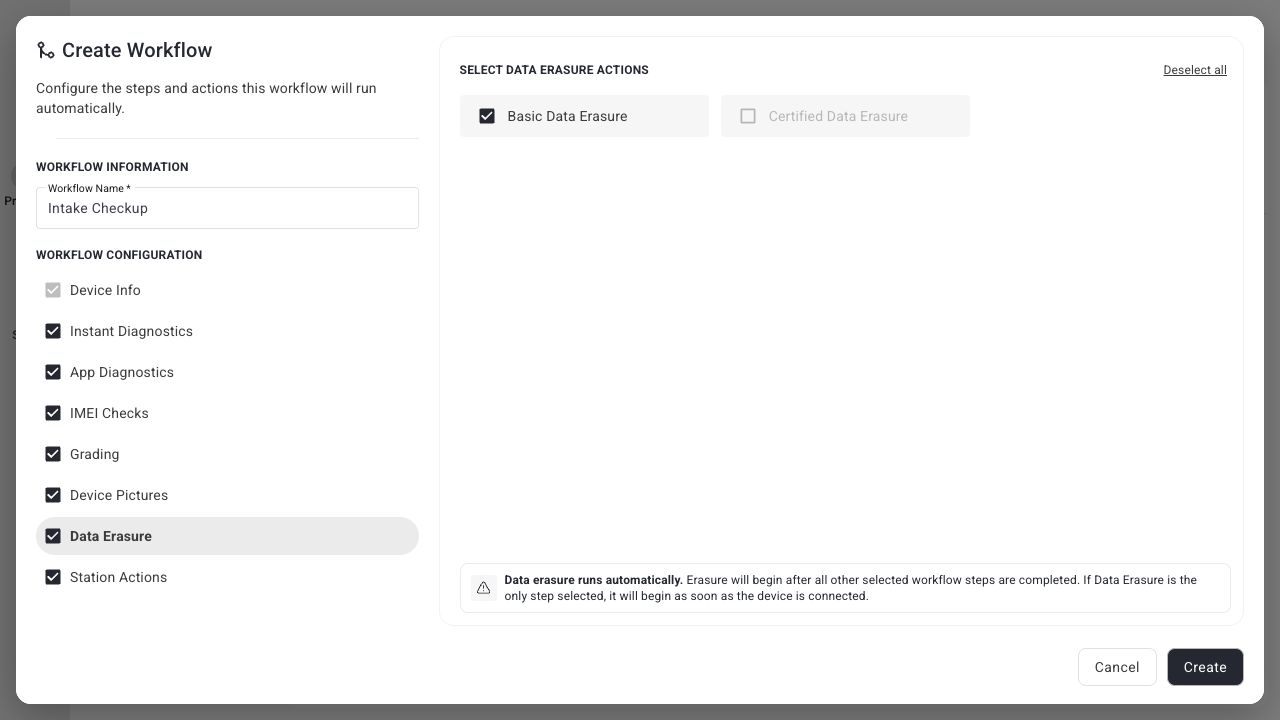
The workflow can begin erasure after its other selected steps are completed. If erasure is the only selected processing operation, it can begin when the device is connected. Review workflow defaults and leave this option off for inspection-only work.
Start a new station session after changing the workflow. Do not assume the change will update a session that is already active.
Eject is a different action
Eject ends/removes a device from active processing; it does not itself start erasure. If your procedure requires wiping the device, verify the erasure result before you finish processing it.
Use History to review the recorded test afterward.
Screens show the Checkup interface with sample data. Names and results in your workspace will differ.